My Self-Taught Blender Pipeline for a Weight Lifting Game Character
How I built a Blender character pipeline from scratch — low poly base, shape keys for muscle growth, inner lines, per-muscle flush effect, and facial expressions — for Ego Lifting Simulator.
Posted by
Related reading
Jun Dev Log — You Only Get What You Train
Three things shipped this month for Ego Lifting Simulator: muscle growth driven by what you actually train, a stamina effect, and character selection.
I sold 450 copies of my first Steam game. Here's what I learned.
450 copies, $1,500 gross. Not a success story — but it cost me enough to be worth writing down what it taught me.
May Dev Log — 4 Workouts In, Physics Feels Right
Dumbbell Curl, Military Squat, Bench Press, and Pull-Up are in. They are physics-driven, with failure states coming next.
I started learning Blender 2 months ago to create characters for my game, and I wanted to share the workflow I have developed so far.
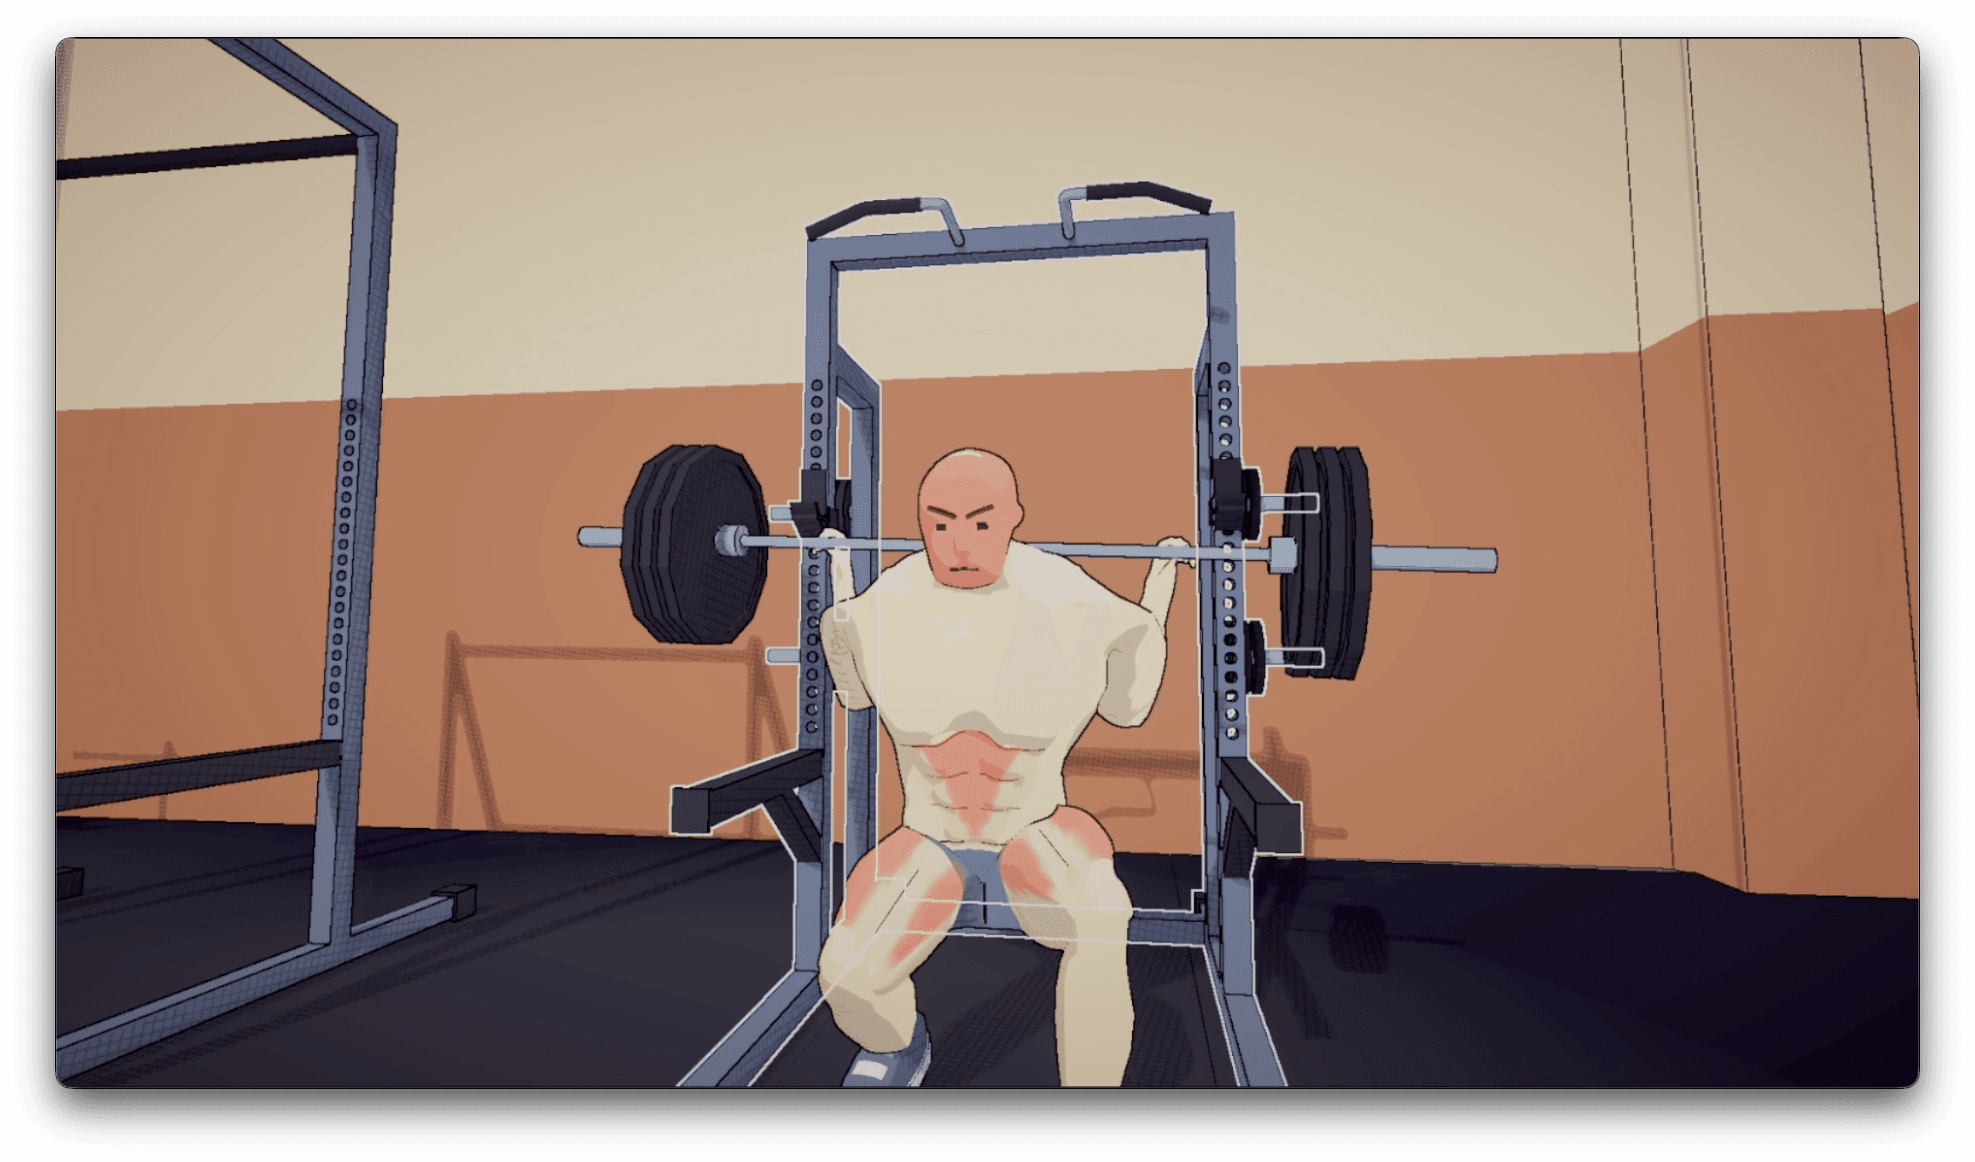
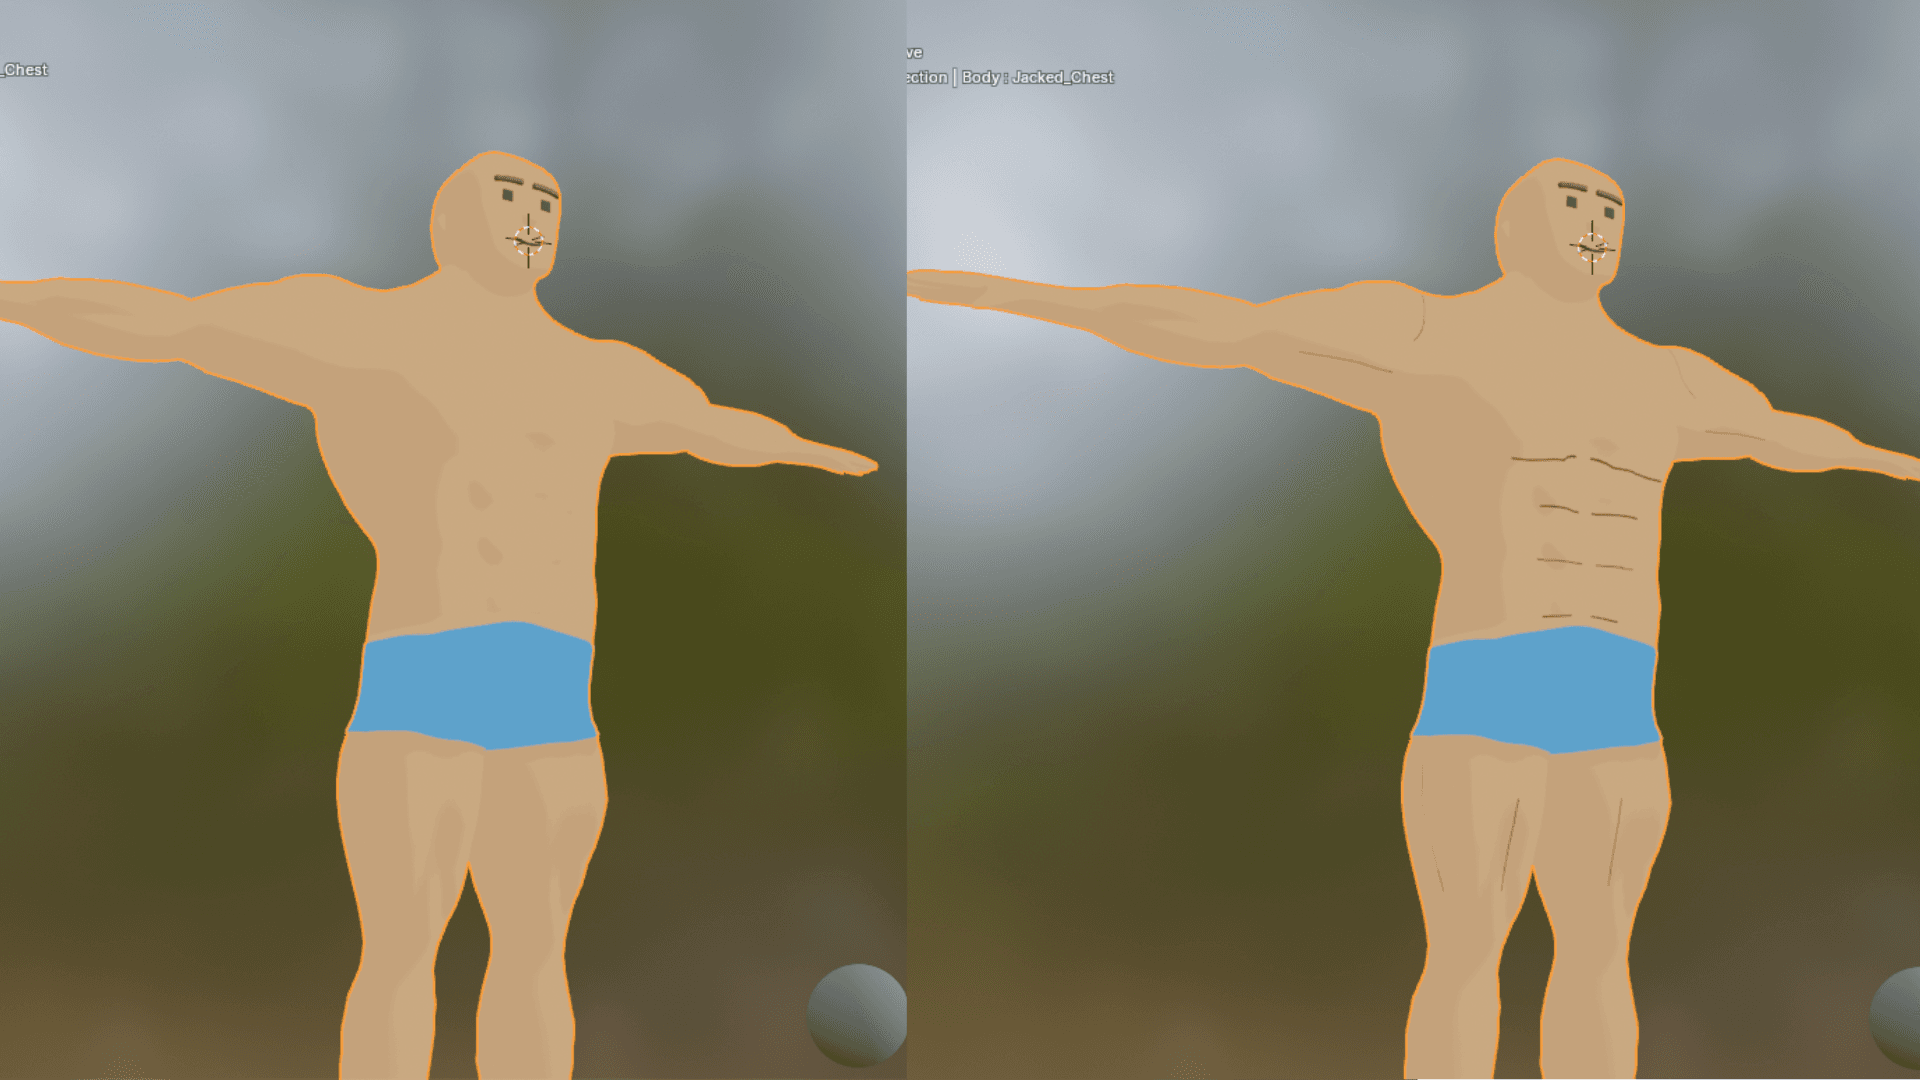
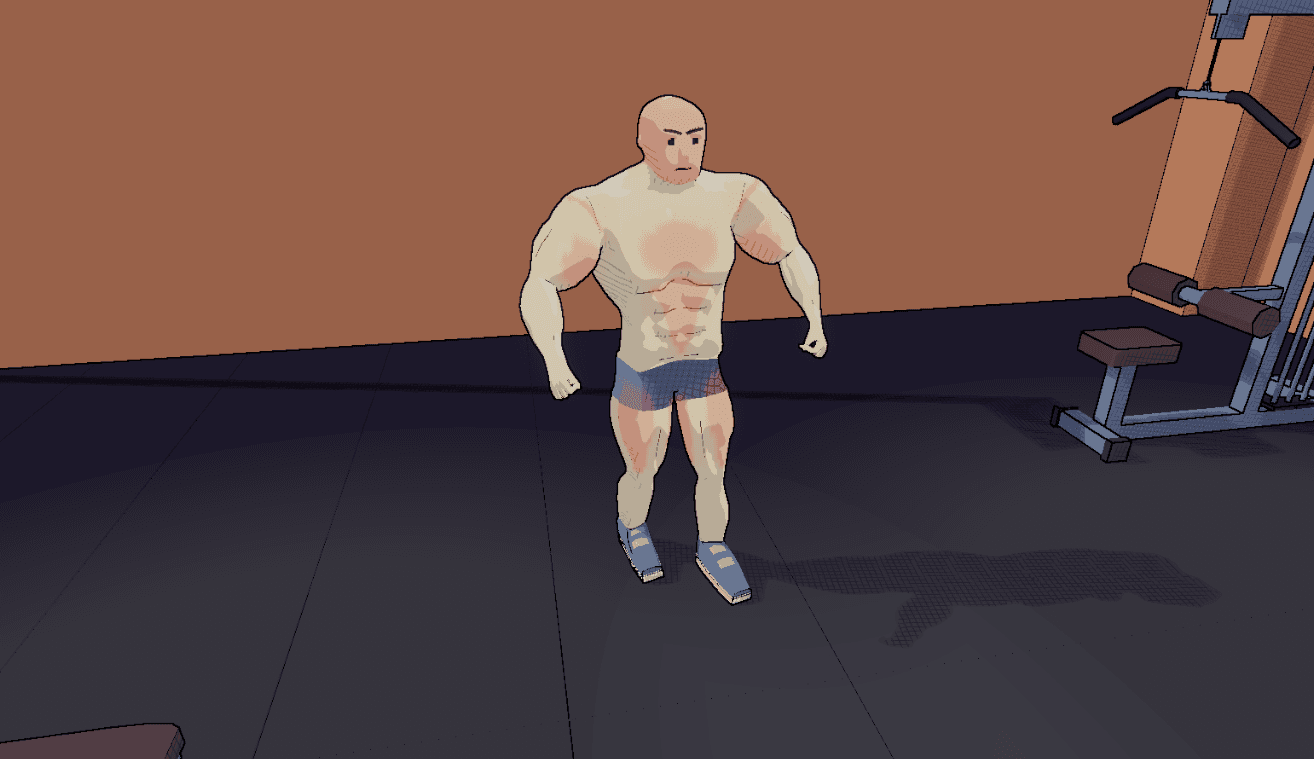
The game is Ego Lifting Simulator — a physics-driven weight lifting game where every muscle you train actually grows on your character. Here is the end result that this whole pipeline produces:
The shader used for the final rendering result is Unity URP, but most of the work happens in Blender.
1. Low Poly Character Base
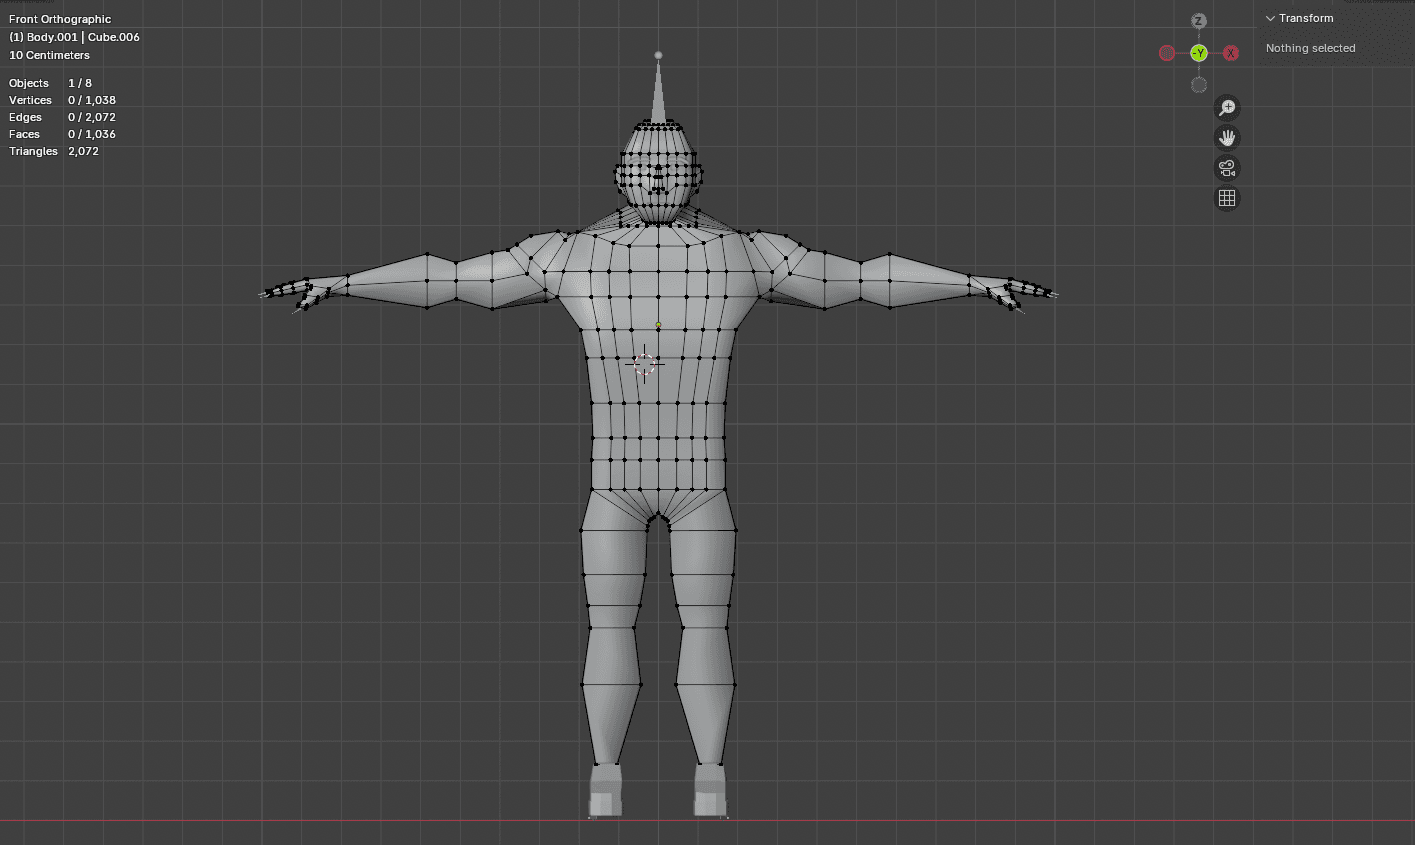
I deliberately chose low poly as my style anchor. As a complete beginner, it felt like the only doable option. At this step, I create a very skinny version of the character with minimal topology.

2. Shape Key for the Jacked Version
Since I am making a weight lifting game, I sculpt out the super jacked version as a shape key on top of the skinny base. My personal insight: it yields a much better result to get the silhouette right in edit mode first when the mesh is still low poly, compared to jumping straight into sculpt mode.
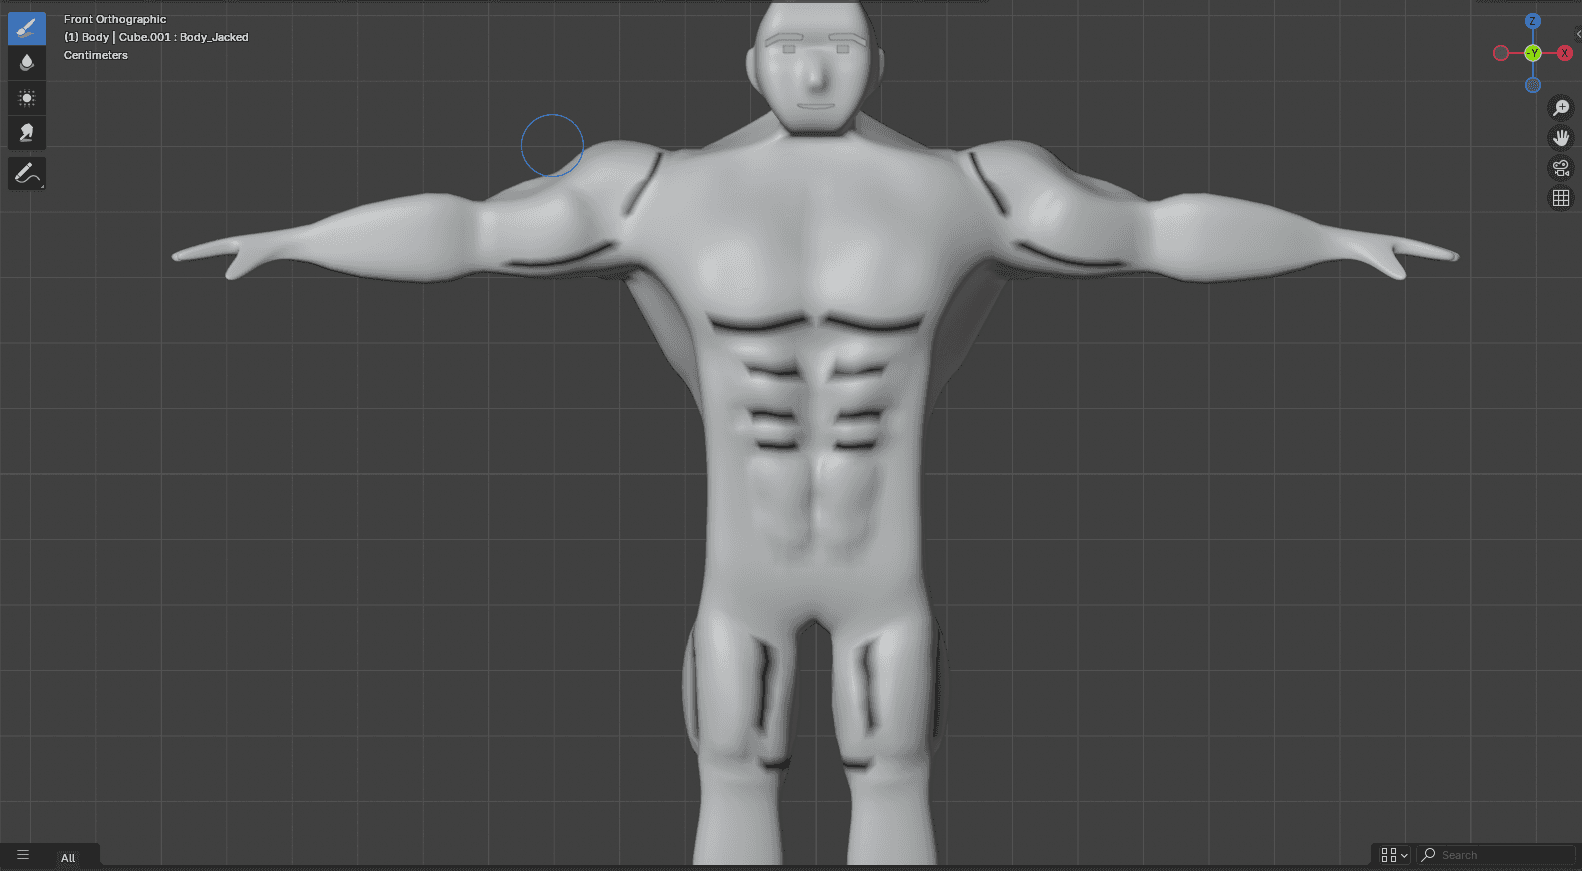
Once the draft shape key is done, I apply 2 levels of subdivision and sculpt the finer muscle details.
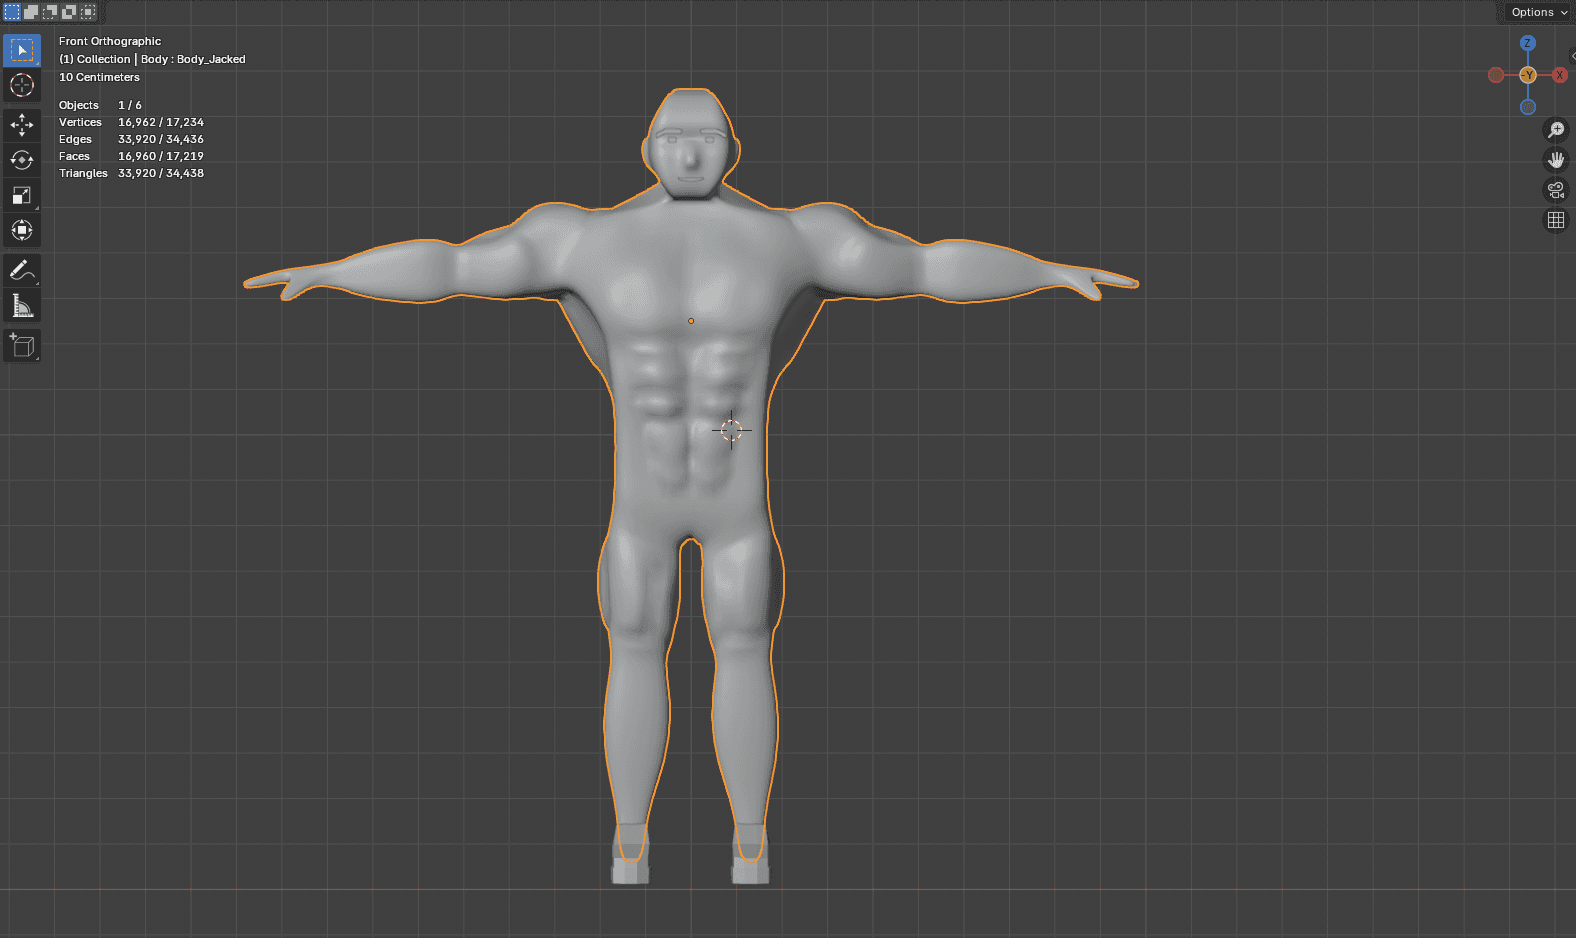
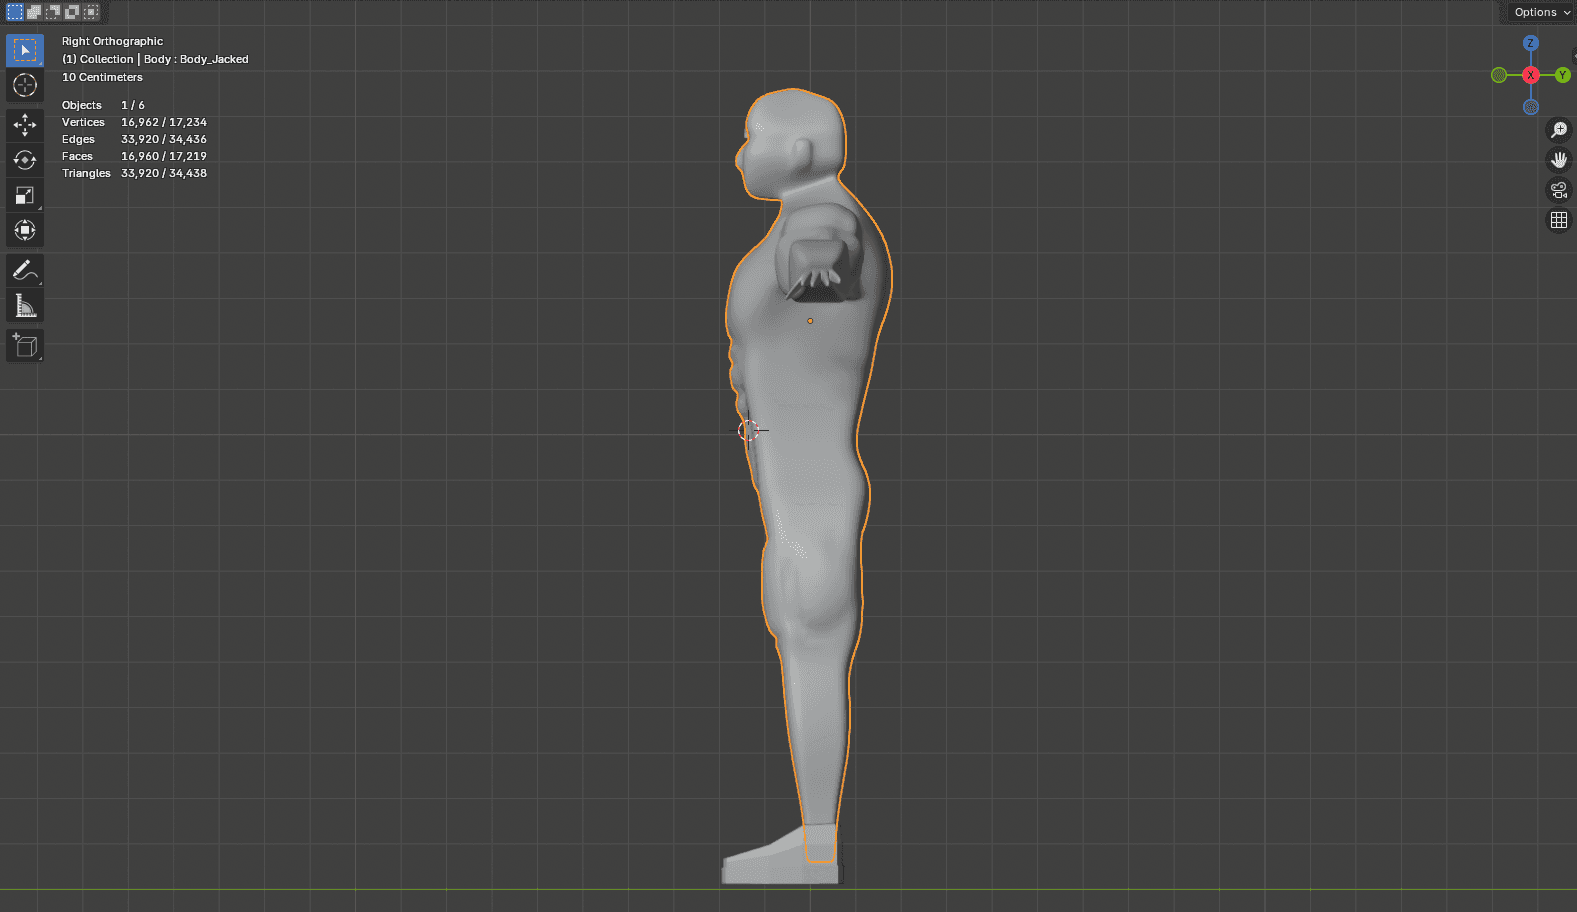
At first I was stubborn about sticking to pure low poly, but it turns out a denser mesh makes it much easier to express muscle detail and gives much better weight painting for armature deform.
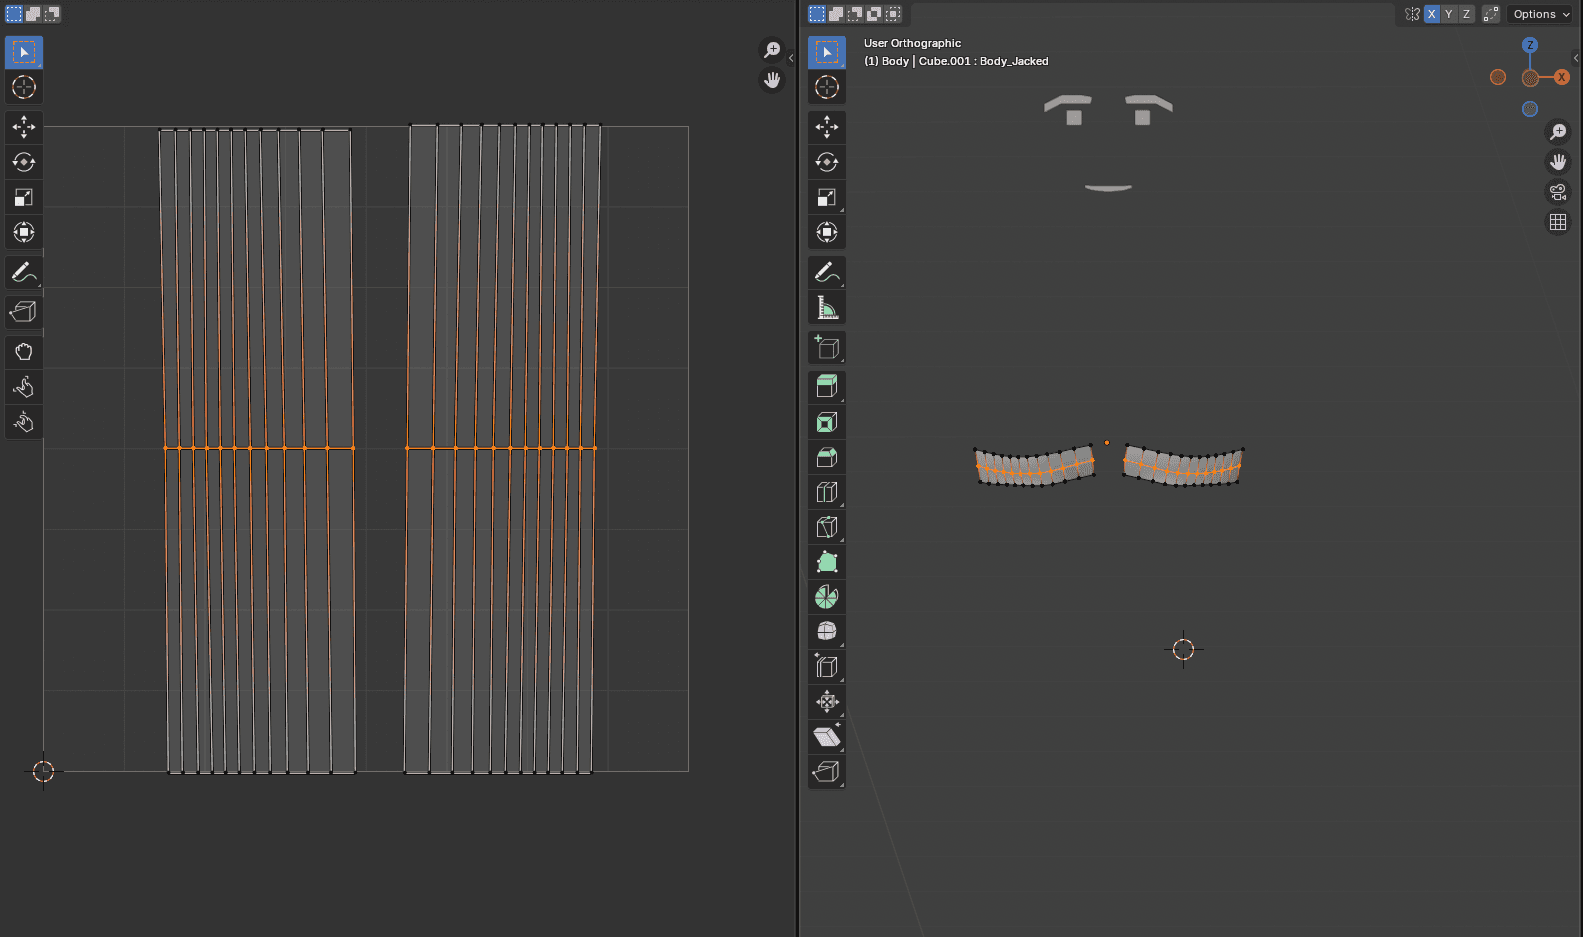
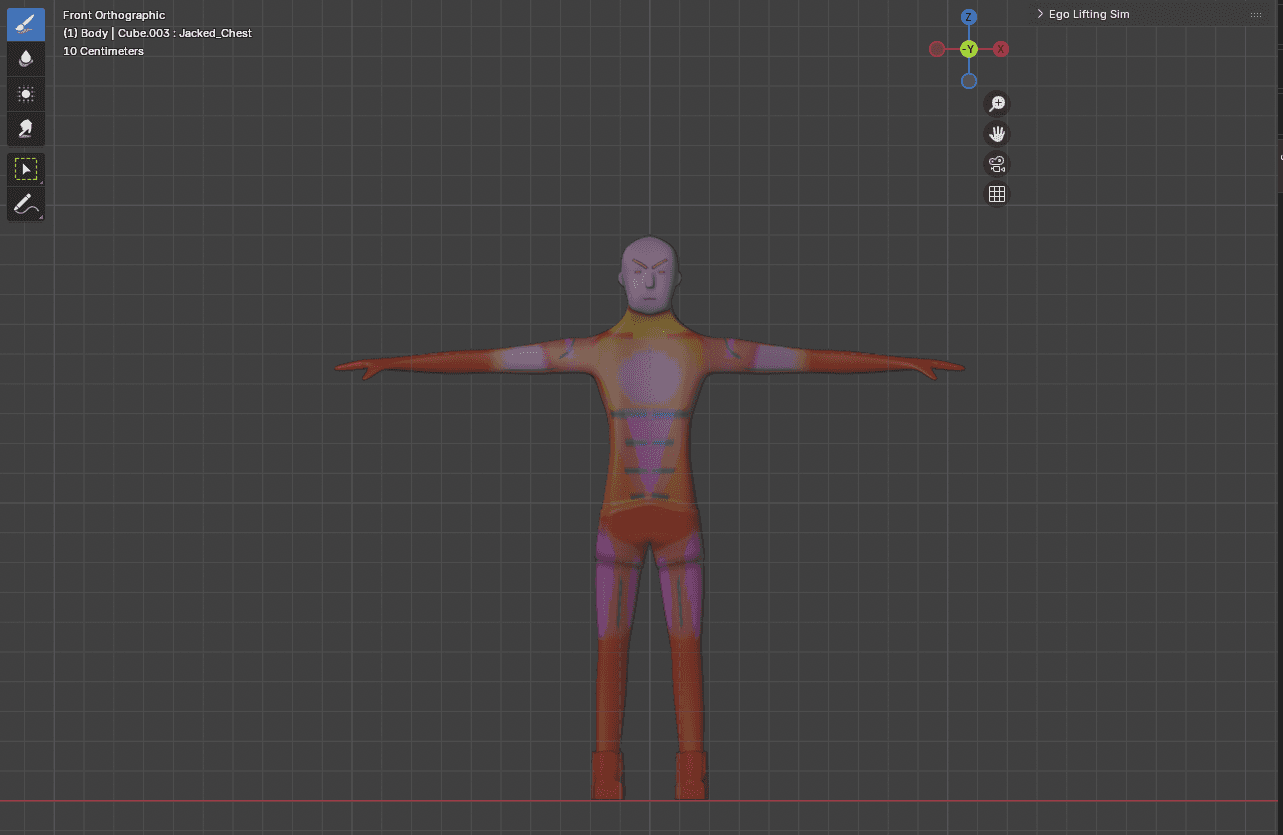
3. Inner Line for Muscle Edges
Even with the added volume from the previous step, the muscles were not always recognizable from every angle. So I added this step to draw inner lines along the muscle edges.
The trick: for inner-line vertices, I set the vertex color's R channel to 0 and the UV map's V value to 0.5. The shader then draws a line wherever both conditions are true.
4. Isolated Shape Key Per Muscle Group
To let players only grow the muscles they actually train, I split the single jacked shape key into separate shape keys per muscle group, each filtered by a vertex group.
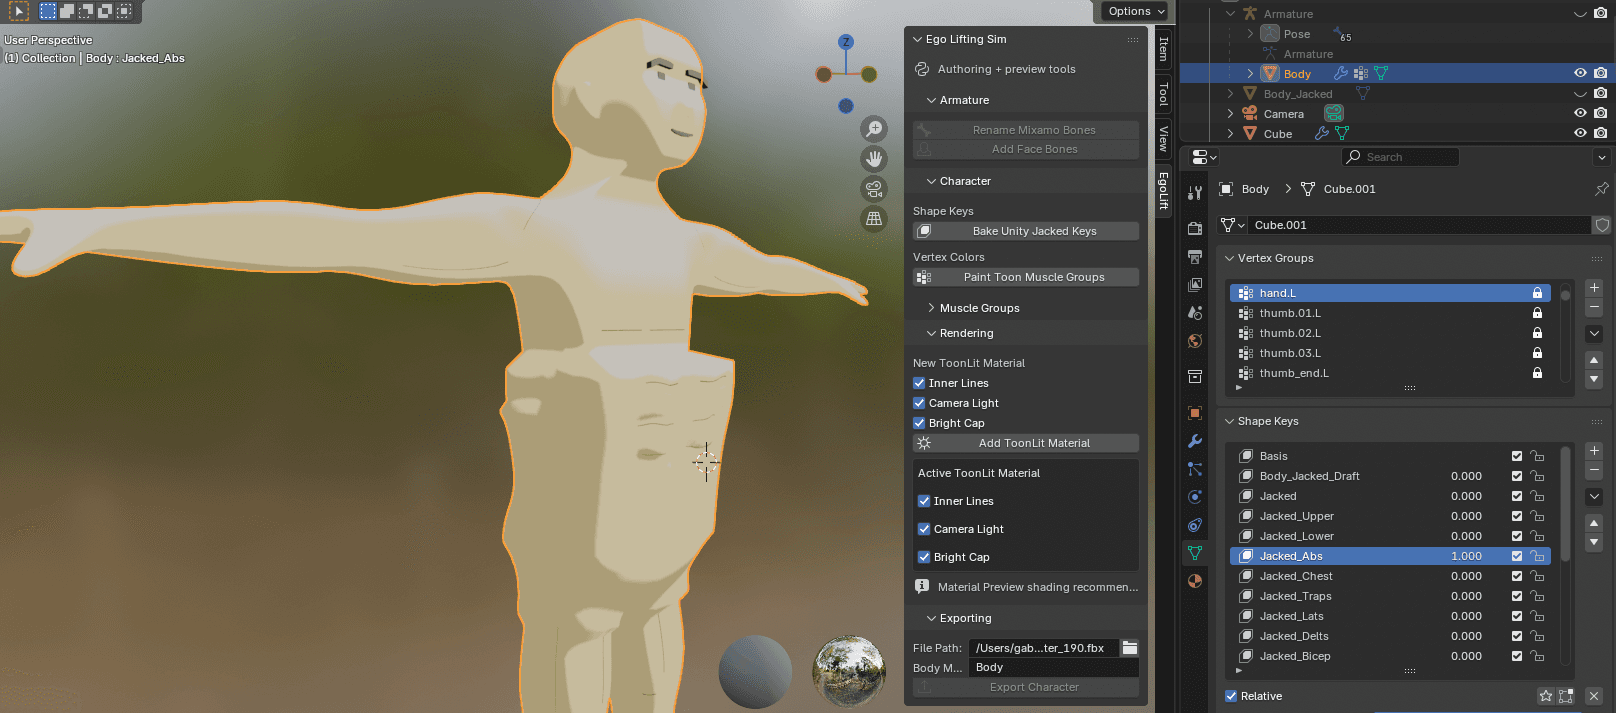
Honestly, this is the part of the pipeline that needs the most improvement. The transitions between groups are too sharp right now and I get weird seams. A potential fix I want to try: build a custom armature where each bone represents a muscle group, so I can use Blender's auto-normalization in weight painting.
5. Muscle Flush Effect
To visualize muscle fatigue, I encode more data into the vertex color channels:
- G channel: which muscle group this vertex belongs to
- B channel: the intensity of the flush effect
The shader reads both channels and outputs a localized red flush that fades as fatigue builds.
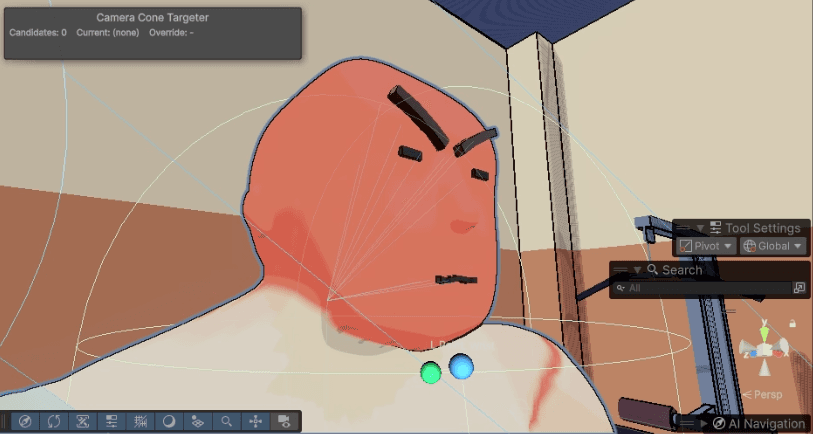
6. Facial Expressions
For now, I added a minimal face rig — just enough to convey the idea that the more fatigued you get, the uglier your face becomes.
7. Final Result
As the player works out, the muscle volume grows and the inner lines appear at the same time. Here is the before and after:

There is still a lot to improve, but the pipeline is fully working end-to-end. If you have any workflow feedback I would love to hear it.
Follow the build
If you want dev updates delivered to your inbox, drop your email below. I send updates whenever something notable happens in the build.